Moreton Bay Websites looks after your website for you when you use our WordPress Hosting Package, so knowing how to do things in WordPress isn’t a skill you have to worry about yourself.
While you don’t need to add new pages yourself with your managed WordPress hosting package, you can still have full access to do things yourself if you wish to do so.
This tutorial will provide the basics of creating a WordPress page.
First Things First
You will need to log into your website using the username and password provided to you. Your user account may have full Administrator or you may have a more restricted user account to hide some of the administration features.
If your user account is not an Administrator, it is usually an Editor which gives you the ability to create and publish web pages on your website.
Create a WordPress Page

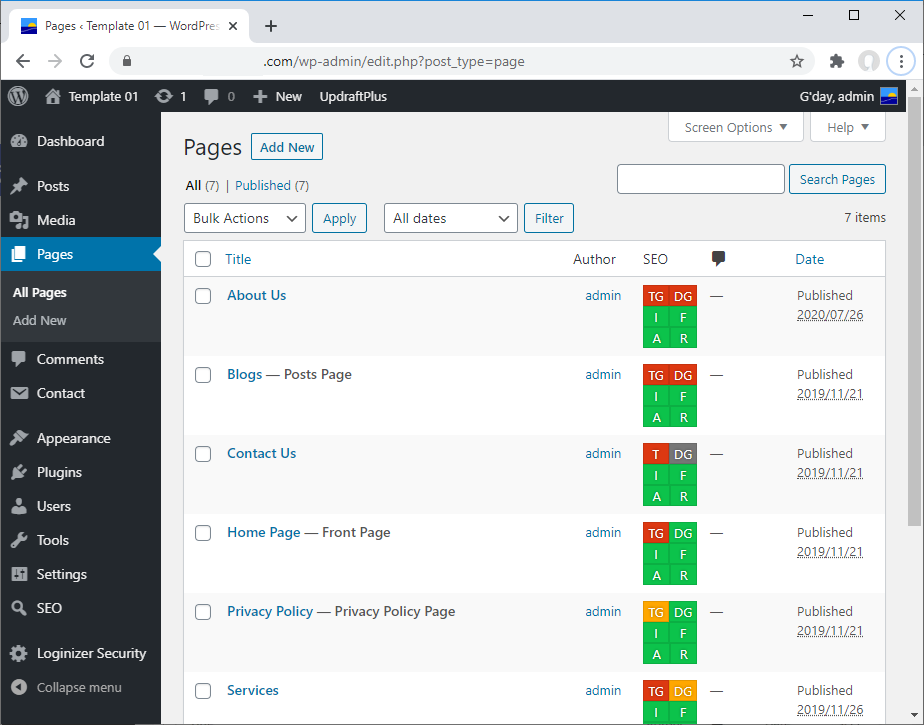
On the left side navigation menu, click on the Pages menu item. Clicking on the Pages menu item is the same as clicking on the All Pages sub-menu item that is shown when you hover over the Pages menu item. A list of the pages on your website is shown.
Click on the Add New button at the top of the page, or click on the Add New sub-menu item under the Pages menu item. This will take you to the Add New Page.

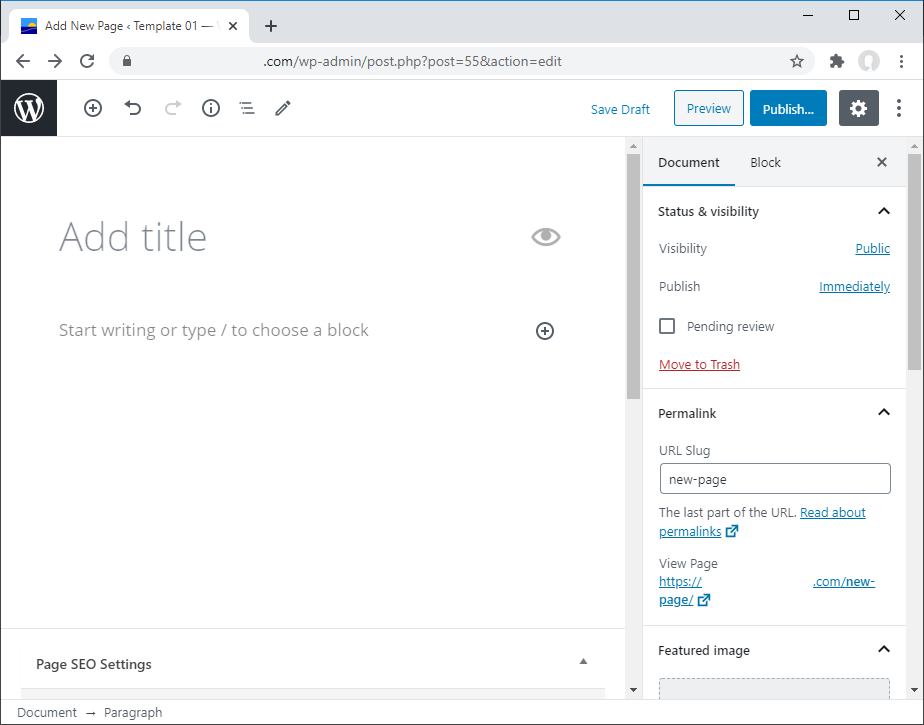
Click where it shows “Add title” and enter the title of the page. Then press Enter on the keyboard or click where is shows “Start writing or type / to choose a block” and you can start writing the content of your page.
At the top of the page is a link “Save Draft”. Click on this when you have the title entered so the page is created as draft and other features are enabled, such as the Permalink. You should click on “Save draft” periodically to save any work you have done on the new web page as you go.
With the draft saved, you can edit the URL Slug in the Permalink section on the right sidebar, shown in the screenshot as “new-page”. The permalink, short for “permanent link”, is a more user-friendly representation of the page shown in the browser URL.
The URL Slug, or simply “slug”, is the last part of the URL for the web page. The URL Slug is automatically created when you first save, based on the title entered at the top of the page. Once created, you can change the URL Slug to something else.
Publish the WordPress Web Page

When the web page is ready to be published, click on the Publish… button. The pre-publish checks is displayed before the page is made live (made available for viewing). This confirms the visibility and publish date before committing the page as published.
If you are ready to for the page to be published, click on the Publish button and your new web page will be live.
The visibility and publish date-time are available before publishing in the right sidebar when editing the web page.
Visibility
Visibility is usually left as Public so the web page is viewable to everyone.
Private is useful if you want if you want it restricted only to Administrator and Editor users but it doesn’t have the control to restrict access to other user types, so its usefulness is limited.
Password Protected uses a different password for every page you use this feature for and if you need to change the password, it has to be changed for every page you use it with.
Publish Date and Time
The Publish date and time is useful to prepare a web page ahead of time to be published at a later date. This feature is particularly useful for WordPress Posts, which are more typically date-based, however, it can be useful for web pages also.
When setting the publishing of the web page in the future, keep in mind that setting links to it from other pages or adding it to the menu, the page will not work until the publish date and time has been reached.
Link The Web Page
Now that your new WordPress web page has been published, you are ready to create links so visitors can find and view it. There are many ways you can make the page discoverable, the most appropriate depends on what the web page is for.
Here are some options for making the web page accessible to visitors:
- Available in website’s menu
- Link in the content of another web page
- Link in a footer widget
- Link in a sidebar widget