This tutorial shows the steps to create a Google Analytics 4 property for your website. The steps can equally be used for a new website or creating a new property to replace the outgoing Univeral Analytics on an existing website.
Google Analytics 4, or GA4 for short, was released in October 2020 as the latest version of Google Analytics. It has been running simultaneously with Universal Analytics (UA) since, however, UA will stop collecting data on 1st July, 2023.
Data already collected by UA cannot be migrated to GA4. The sooner GA4 is enabled for your website, the sooner web audience information will grow.
Dual Tagging
You can dual tag GA4 and UA, collecting data for both. Continue using Universal Analytics while your Google Analytics 4 data grows. When data collection stops for UA, your GA4 data collection will be ready.
If you are not already using UA, then simply use GA4. There isn’t much point creating new Universal Analytics properties with the deadline getting closer.
Create A Property
To get started, go to the Admin of your Google Analytics account, by clicking on Admin with the gear icon at the bottom of the left menu.
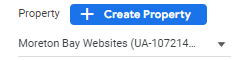
Next, click on the Create Property button to begin creating the new Google Analytics 4 property.
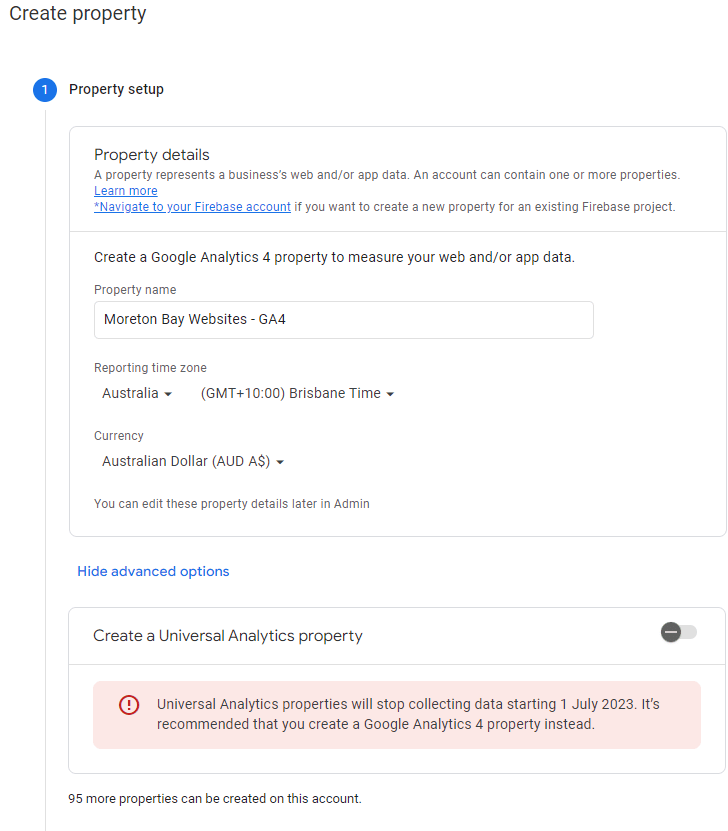
Property Setup
The first step is to provide the name of the property and set the time zone and currency for reporting within Google Analytics.
Try to use a name that means something for the website. If you share this property with an agent, the name “my website” won’t mean much to them when they have hundreds of names to work with.
I typically use the name of the website itself or the business name it is related to, such as Moreton Bay Websites or Walker Certification Website. When creating a new GA4 property for an existing website with Google Analytics, I often include a GA4 suffix.
The time zone is set by first selecting the country, usually the country the website is targeting, then selecting one of the time zones available within the country.
Finally, select the currency for your country.
There is an advanced options section that allows you to create a UA property, connected to the GA4 property being created. As mentioned before, there isn’t much point in creating a new UA property anymore. If you already have a UA property, this can be connected to your new GA4 property later.
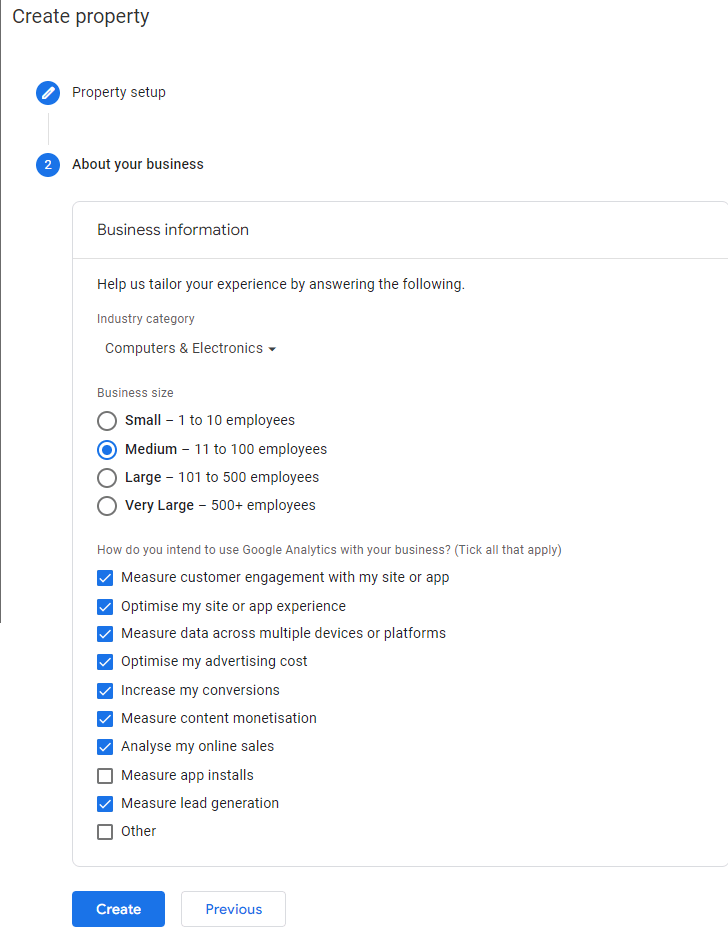
About Your Business
The next step provides some basic information about your business. The first is the industry category, which can be tricky for some.
For some businesses, there is a category that fits perfectly. For others, there may be multiple categories or nothing that fits neatly.
The industry category is used for benchmarking with other businesses in the same category. It doesn’t change the data collected or reporting details within your own website. If there is no category that fits, select Other and use a generic industry term.
The business size is also used for benchmarking. Selecting the appropriate size lets reporting comparisons with similar sized businesses.
Lastly, select the intent of using Google Analytics for your website. You can skip this section if you do not want to fill it in.
Click on the Create button and your new GA4 property will be created. Wait! There are still some more steps to complete before it is ready.
Create a Web Data Stream
Google Analytics 4 is different to UA where you can use filters for different views of the same data. Instead, one or more data streams collect the data for processing in Google Analytics for different purposes.
Immediately after creating the property, you will be presented with options for creating a new data stream. As this is for a website, select Web when it asks to Choose a platform.

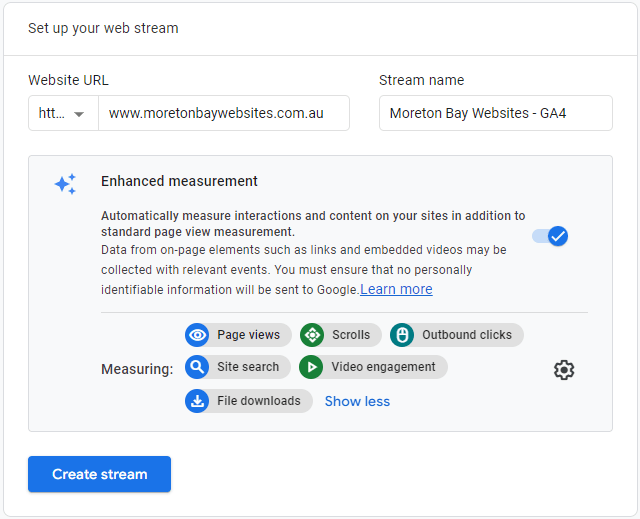
Set Up Your Web Stream
The web stream is configured to your website. Enter the website URL the web stream is to operate.
The first selection is for https or http. Your website should always be https, if not, you need to get your website updated to force the use of https.
The website URL should be entered as itself with the https entered before it, so for example, www.moretonbaywebsites.com.au.
The stream name can be whatever means something to you. I normally put in the name of the website or use the same name as the property name, especially for the first web stream.
Below is the enhanced measurement options. We won’t be discussing the specific details around the different measurements in this article. Ensure Enhanced measurement is enabled and use the default measurement settings.
Click on Create Stream to finish creating the web data stream for your website.
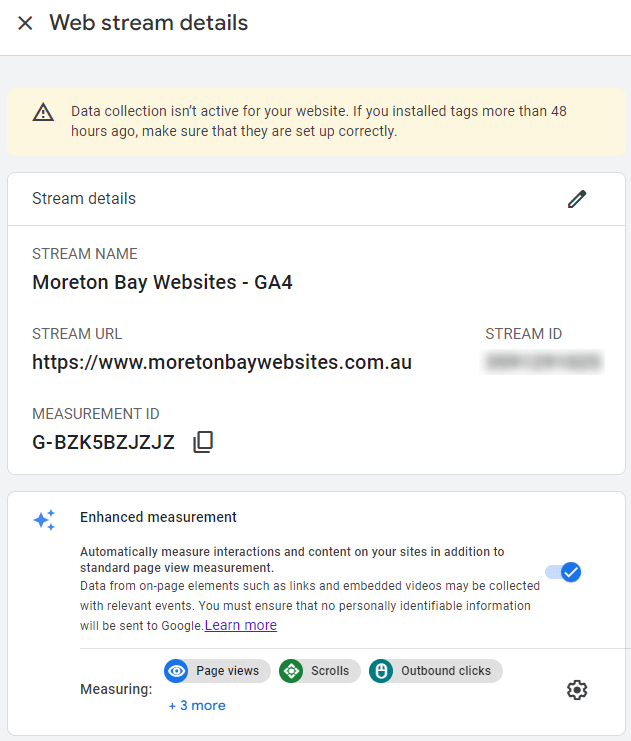
Web Stream Details
Once the web stream has been created, you can view the stream details. It is here where you can see the measurement ID, which is the GA4 equivalent of the UA Tracking ID.
The GA4 Measurement ID starts with a G- and followed by letters and numbers. The example below shows G-BZK5BZJZJZ.
The older Universal Analytics Tracking ID starts a UA- followed by numbers. If you already use UA, it may look familiar to you such as UA-153424897-1.